
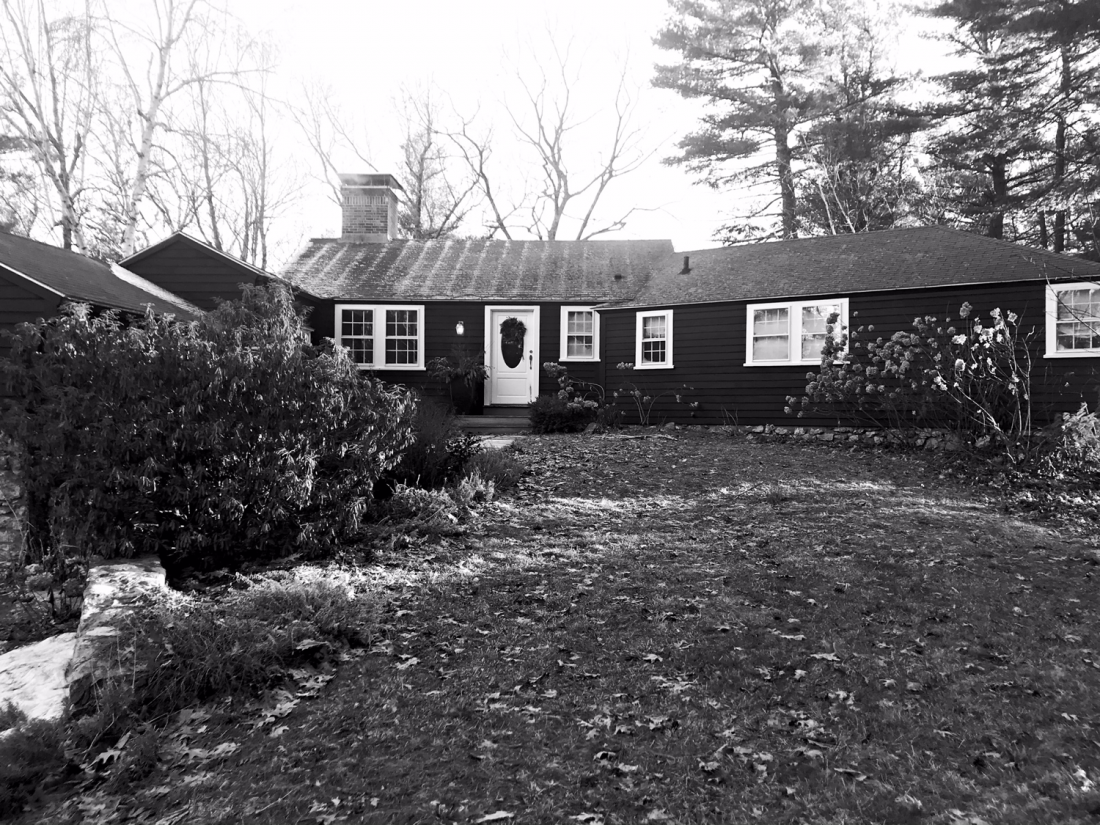
For years, I used the planting bed near my front door as a holding area for new plants that didn’t yet have a permanent home. It was a mishmash mess that became exhausting to look at. I wanted a more cohesive design that highlighted the house — especially now that it is freshly painted.
The bed was too grassy, the soil was junky, and nothing really thrived there. I also wanted an interesting focal point — specifically a Japanese maple — to add more vertical interest and anchor the planting.
I used this project in my online garden design courses as an example of how to design a planting bed, starting with a master plan and eventually moving into a detailed planting plan and installation strategy.
Now that the plan is complete, I’ve been in a flurry of garden renovation to finally bring it to life.
Start With the Biggest Plants First
Q. Where do you start on a new planting project like this?
A. Biggest first. Start with the trees and shrubs.
My plan required removing an established Pieris that was taking over the front steps and blocking views in every direction. It was a sad day to take such a beautiful shrub down — especially since it was in full bloom and the bumble bees were loving it.
As I cut and dug, I discovered three babies growing underneath. I transplanted them to other parts of the garden, which softened the sting of removing something so healthy and beautiful.
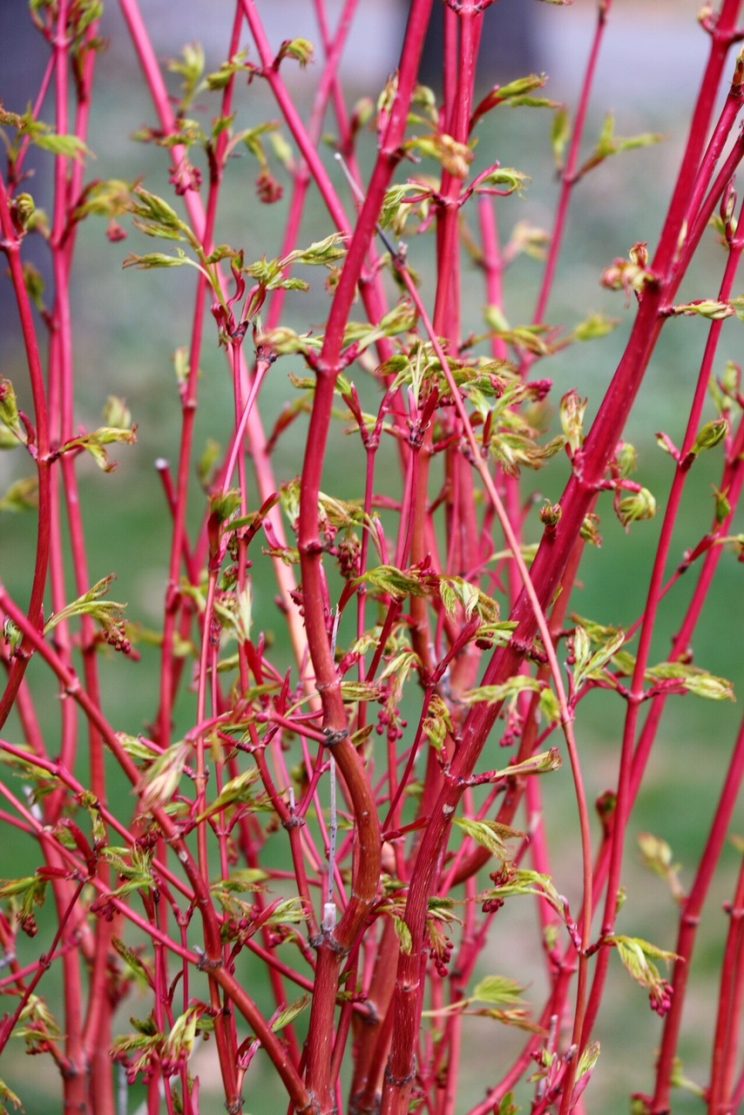
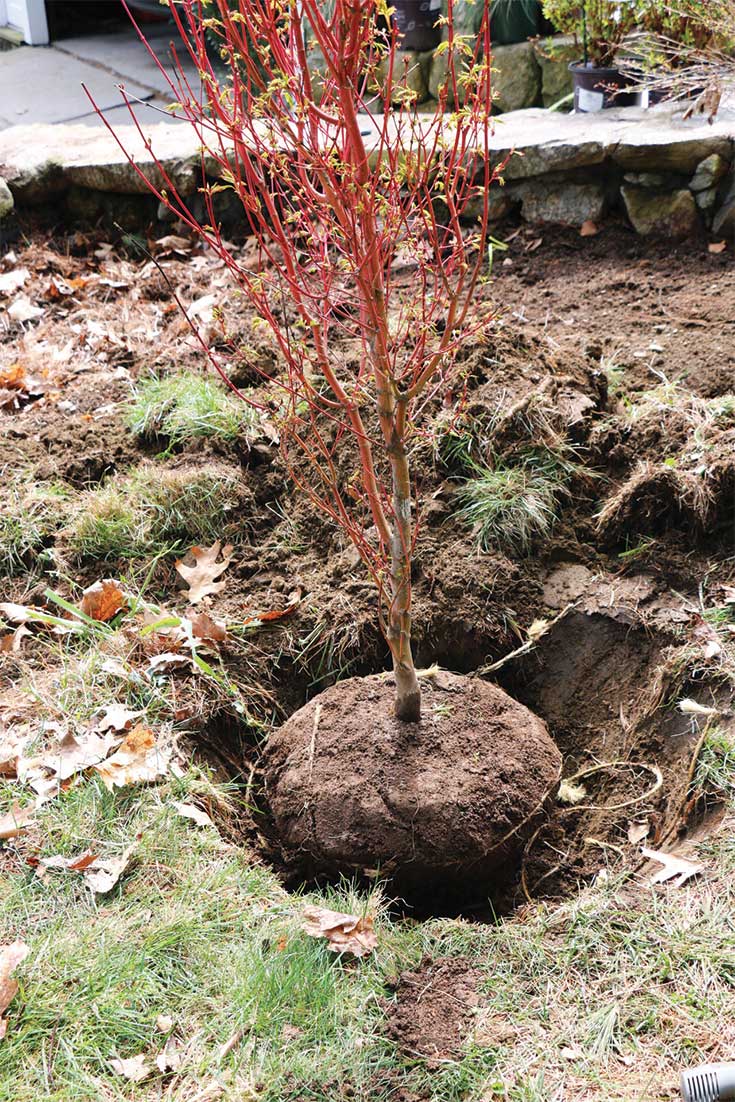
With the giant shrub gone, I finally had room for a new focal point — Acer palmatum ‘Beni Kawa’, a coral bark Japanese maple.
There are roughly one million Japanese maple varieties. (Possibly more.) I always encourage people to look beyond the standard ‘Bloodgood’ — though there’s absolutely nothing wrong with one. The Japanese maple world is full of strange, beautiful, and highly specific plants if you’re willing to go down the rabbit hole.
‘Beni Kawa’ is right-sized for my garden, eventually reaching about 12 to 15 feet tall and wide. I love the bright coral-red bark and the ombré foliage that shifts from yellow to red. It’s striking even before it fully leafs out.
How to Plant a Tree So It Survives
Q. How do you plant a tree so that it doesn’t die?
A. The devil is in the details.
We all know the basics — dig a hole, put the tree in the hole, bury it, water it. Easy, right?
But this is exactly where things often go wrong.
Have you ever heard the phrase:
“Plant it high, it won’t die. Plant it low, it won’t grow.”
Old gardener wisdom. Also very good advice.
The single most important thing when planting a tree is depth. You do not want to plant too deeply.
Err on the side of making the hole slightly too shallow rather than too deep. If you accidentally dig too deep, fill some soil back in and mix in compost while you’re at it.
A good way to check depth is to use the shovel handle as a measuring stick. Lay it across the hole and make sure the root flare of the tree will sit about 1–3 inches above the surrounding soil level once planted.
That extra height matters because soil settles over time.
Have you ever heard of the $5 plant in the $50 hole? Spend time on the hole and make it good – because a cheap plant can become great if planted correctly. And since trees aren’t cheap – especially Japanese maples – make extra sure you invest in correct planting.
Before you put the root ball in the ground, a good way to check the height is to use the shovel to measure. Dip the handle in the hole and grab it with your hand where it meets the ground level. Then use that measure to make sure that the flare of the tree is 1-3 inches higher. This way, once you‘ve maneuvered the tree into the hole, you won’t have to wrestle it back out again to add more dirt beneath.
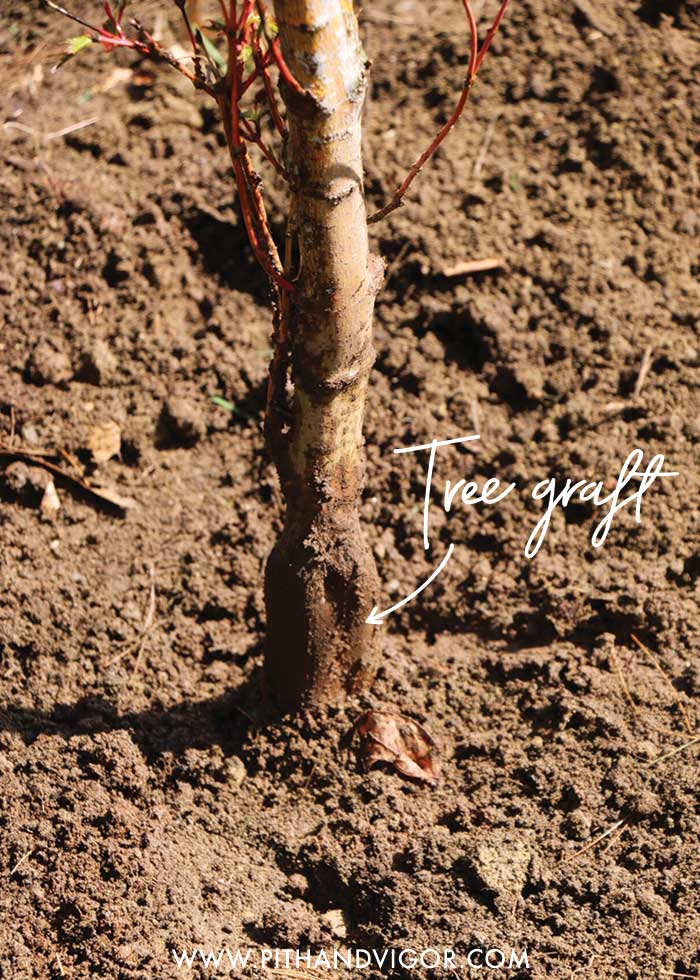
What Is the Root Flare?
If you look at the base of a tree you might see a couple things. First, every tree has a flare. The flare is where the vertical stem starts to widen out and become roots. You don’t want to bury the flare, you want it to sit right above ground level.
At some point the stem will come down and start to spread out to the sides as the roots go into the ground. The spreading fingers are called flares and you should NOT be bury them. If you bury the flares, either when you are planting it or later if you mound up too much mulch around the base, you are endangering the health of the tree.
You might also (depending on the tree) see an area where it was grafted. This is done to strengthen trees and involves combining two trees into one super tree. Typically it is a tree with strong root stock combined with a top that is more ornamental. The graft is always above the flare and can sometimes look like an unexpected bumpy area of the stem. You DEFINITELY do not want to bury the graft!
If you are planting so that the flare is at the right level, you shouldn’t have any problems. But if you plant so that the graft is below the soil or mulch level, what can quite likely happen is that the top part of the tree will start to develop its own root system. It will no longer use the much stronger and better grafted root stock and ultimately you end up with a weaker tree.
If your tree was grafted, you should be able to see the graft. (BTW – most all new Japanese Maples that you would plant are grafted- as are many fruit trees). Sometimes the graft is a foot or two up the stem, but sometimes it is really low – just barely above the flares.
Sometimes, especially with balled-and-burlapped trees, extra soil gets pushed up around the trunk during digging. Before planting, you may need to carefully remove excess soil to expose both the flare and the graft properly.
Balled-and-Burlapped vs. Container Trees
The Japanese maple I’m planting is balled and burlapped, meaning it was field grown, dug, and wrapped for sale.
This differs from container-grown trees, which spend their entire lives in pots.
With balled-and-burlapped trees, you mainly need to remove the wrapping. With container-grown trees, inspect the roots carefully before planting. If the roots are circling densely around the pot, loosen them and encourage them to spread outward instead of continuing to spiral.
Circling roots can create major long-term problems for tree health.
If given the choice between a balled-and-burlapped tree and a container-grown tree — all other things being equal — I generally prefer the balled tree because it tends to establish more naturally in the landscape.
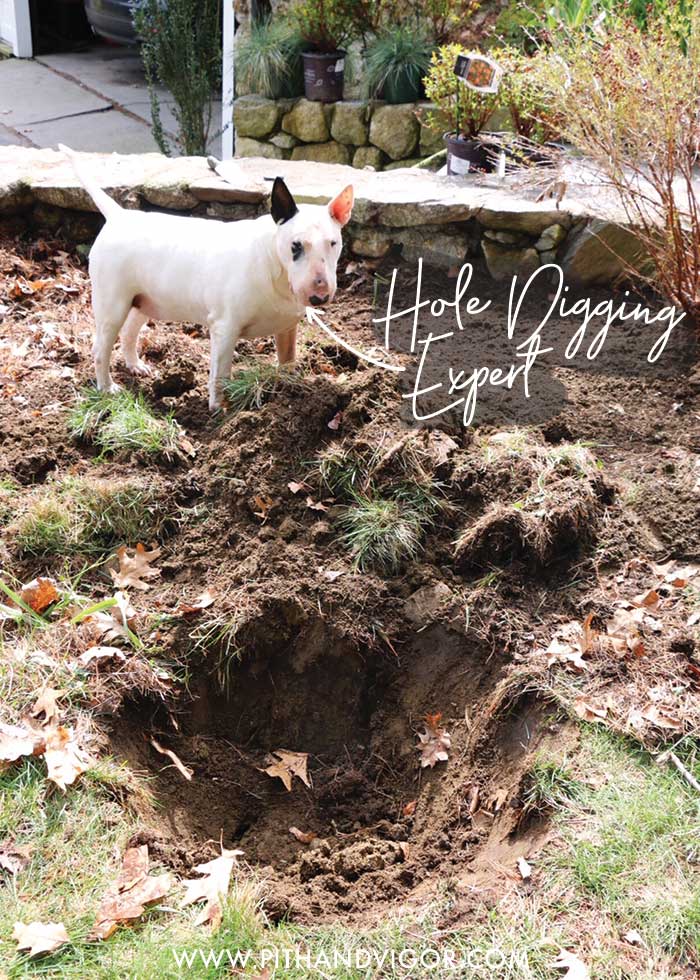
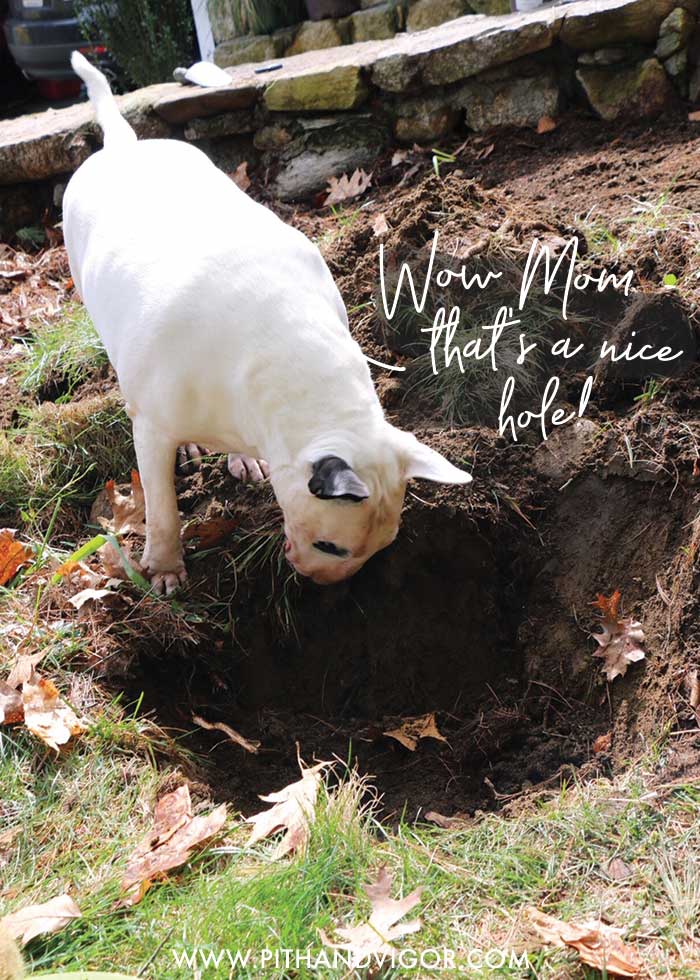
Dig a Wide Hole — Not a Deep One
The planting hole should be wide — ideally two to two-and-a-half times wider than the root ball — but not excessively deep.
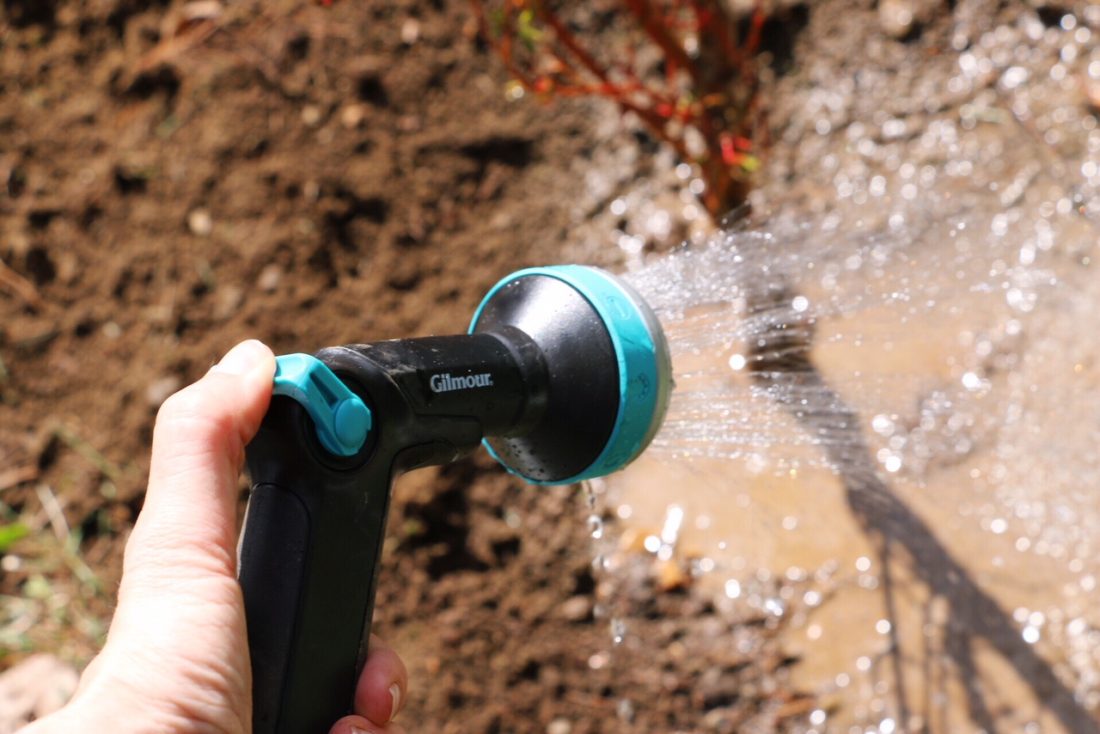
Before backfilling, I like to partially fill the hole with water and let it drain. Trees need a tremendous amount of moisture during transplanting, and pre-watering the hole helps hydrate the surrounding soil.
If the root ball itself feels dry, water that thoroughly before planting too. It also helps keep the root ball intact while maneuvering the tree into position.
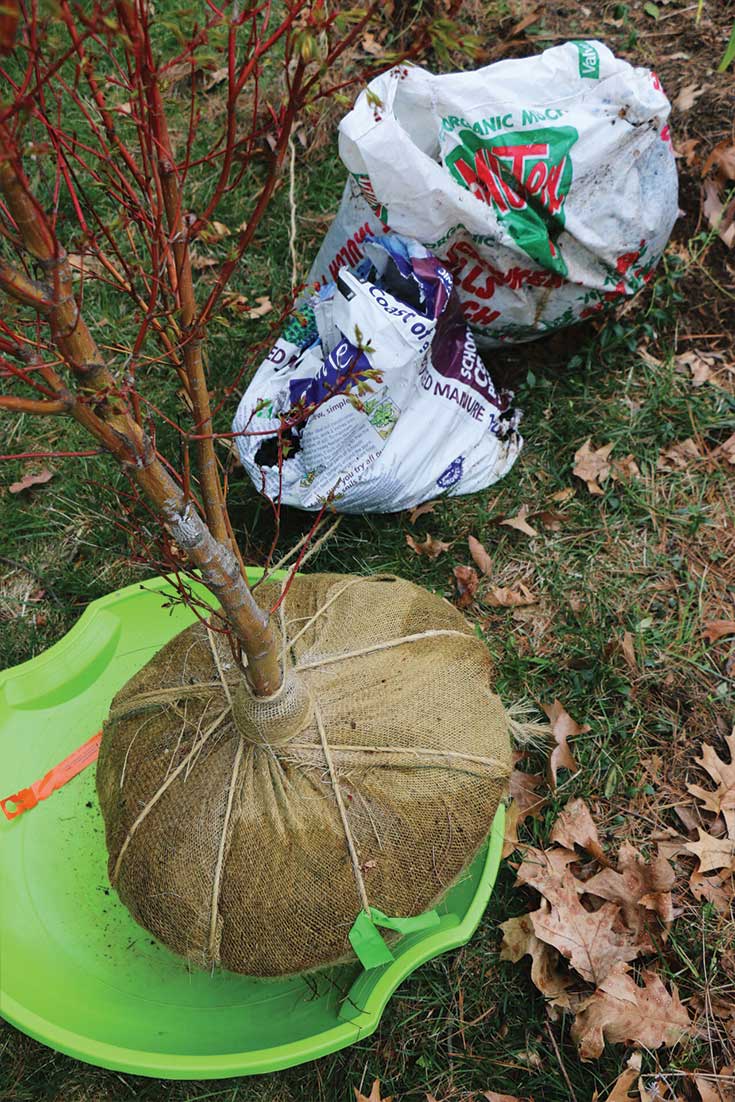
As you refill around the root ball, use the native soil you removed mixed with compost. If you’ve dug out chunks of turf, you can even flip those upside down and use them to help stabilize the root ball or fill gaps. Grass buried upside down generally won’t regrow.
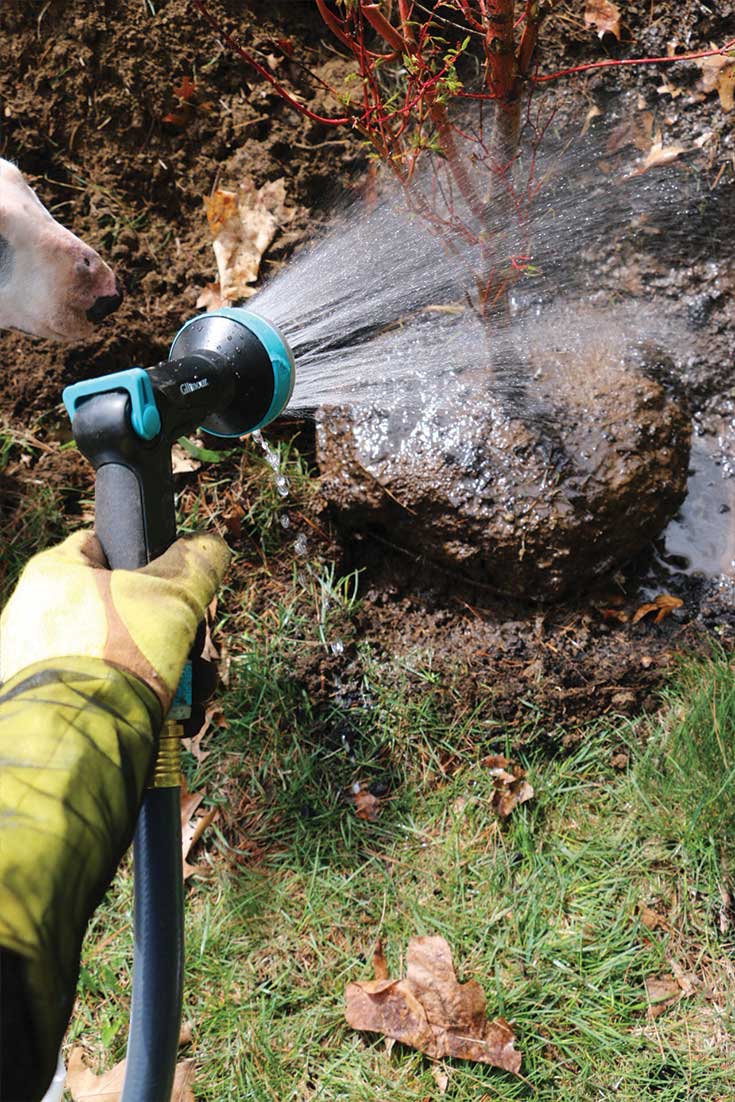
Plant, Water, Mulch, Water Again
Once planted, I follow this sequence:
- Plant
- Water
- Mulch
- Water again
That second watering helps settle mulch into place. Many mulches expand slightly when wet and then contract as they dry, helping lock everything together.
Lightweight mulches — like buckwheat hulls — especially benefit from that second soaking or they tend to wander around the garden during the first decent windstorm.
A Surprisingly Useful Garden Tool
One of my favorite tricks for moving heavy trees around the garden is using children’s plastic dish sleds.
Seriously.
They’re easier to load than a wheelbarrow because you can roll heavy root balls directly into them instead of lifting. Then you simply drag them where they need to go and slide the tree into position.
Gardeners are basically just landscapers improvising with whatever happens to be nearby.
Q. So now that I have my Japanese maple tree planted – what do I do?
A. Newly planted trees need special attention if they are going to survive.
The main reason transplanted trees and plants fail is due to not getting enough water. Yes, there are other factors (in the case of trees, shock is also a worry) – but mostly it is water. And when I say mostly, I mean almost always. There is a common misperception that rain and irrigation systems are enough but the reality is they usually aren’t. You have to water new trees. Plan to do this by hand to make sure they get the TLC they need.
How Often Should You Water a Newly Planted Tree?
Q. So now that the tree is planted — what next?
A. Water. Then water again. Then keep watering.
The number one reason newly planted trees fail is lack of water.
People often assume rain or irrigation systems are enough. Usually they aren’t.
Newly planted trees need regular hand watering while establishing. The roots simply haven’t spread far enough yet to fend for themselves.
Here’s the general schedule I follow:
- Daily for the first week
- Every other day for the next two weeks
- Then 2–3 times per week for the rest of the first growing season
Keep the hose nearby. In busy planting seasons, I sometimes don’t even bother turning the spigot off between watering sessions.
What About Transplant Shock?
If your tree starts dropping leaves or looking stressed despite proper watering, transplant shock may be the issue.
Shock can happen even when everything is done correctly, especially during hot weather or when moving large trees.
There are many products marketed for transplanting, but I’ve had good luck using diluted Super Thrive as an emergency intervention. A little goes a very long way, so don’t overdo it.
Most importantly — act quickly if a newly planted tree starts declining. A few days can make a big difference during establishment.
And now I just need to finish planting the rest of the bed.
Check out this post to see the garden as it has progressed:
Cut it Or Keep It- Maintaining a New Naturalistic Garden
You might also find these posts helpful when planting trees:
Share this post:
Inside that ball is clay and roots that have taken on the shape of that ball. Hopefully there aren’t circling roots, but you don’t know that unless you bareroot the tree. The best way to plant a tree is to bareroot it. Yes aftercare is critical, but the only way to be sure that roots are growing radially away from the trunk is to bareroot it. Additionally, you never add compost to the hole. That will simply encourage roots to stay in the hole you dug and not go out into the surrounding native soil. If your soil is poor, then amend by adding a 1/2 inch of compost in a wide circle around the tree to encourage root growth outwards. Other than these things the article is spot on. Check out Linda Chalker-Scott from Washington State University on the bareroot planting of trees.