Hayden Regina is the creator of the Hobbit Houses at Fernwood Botanical Gardens in Niles, Michigan. He shares how he created a set of charming little garden playhouses from simple materials that cost around $250 each.
Who doesn’t want to imagine life in The Shire living like Frodo and Bilbo? Or at least pretend for a little while….- Rochelle
Place yourself in the mind of a five-year-old.
The imagination and creativity of a child are often lost as people grow older. Many still call me a child at the ripe old age of 18, and maybe the truth is why I wanted to design a Nature Adventure Garden at Fernwood.
My idea is for a garden to entertain the thoughts of children. I want to draw them back outside and away from the television and video games.
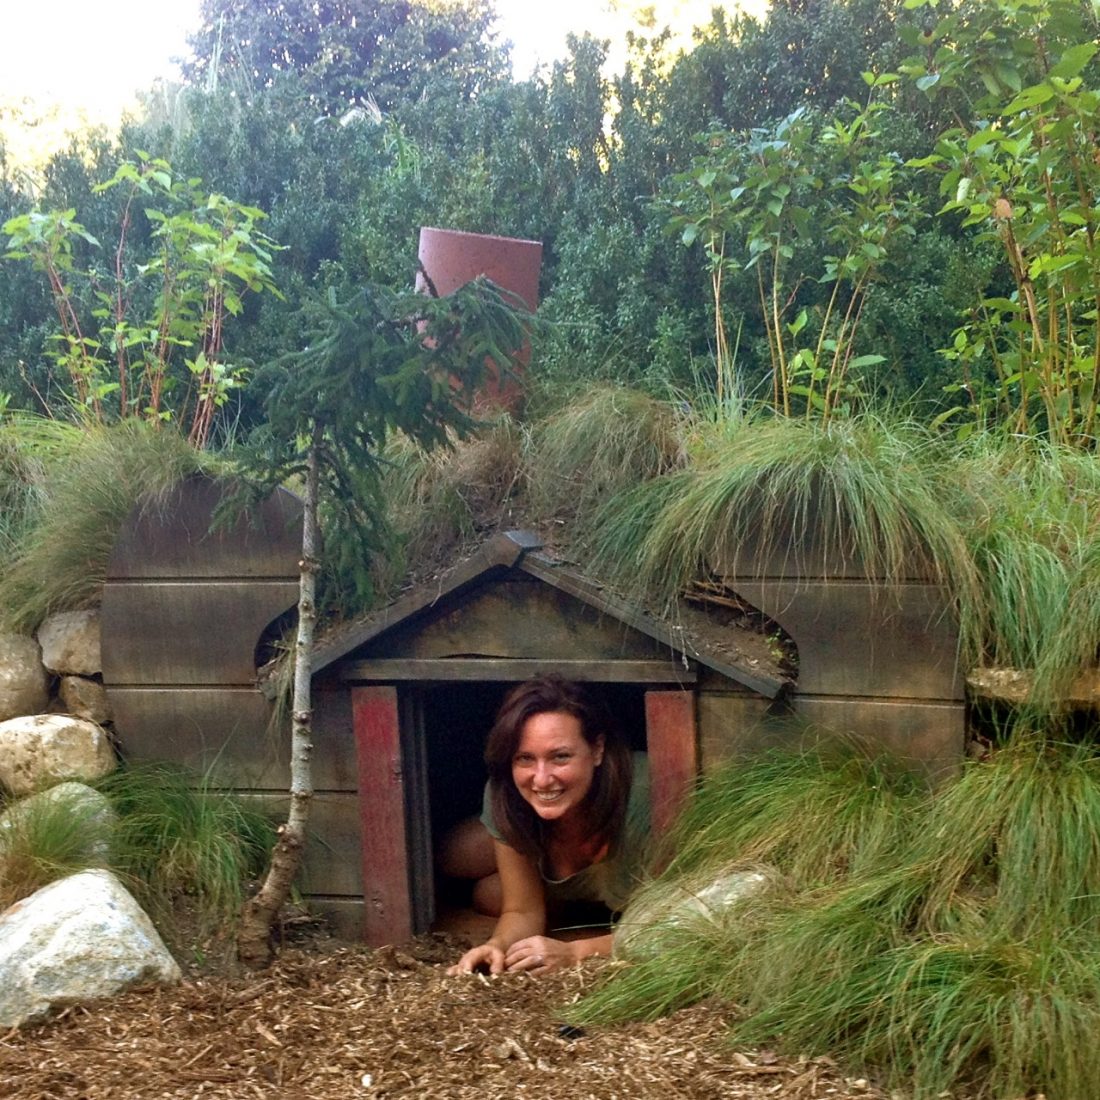
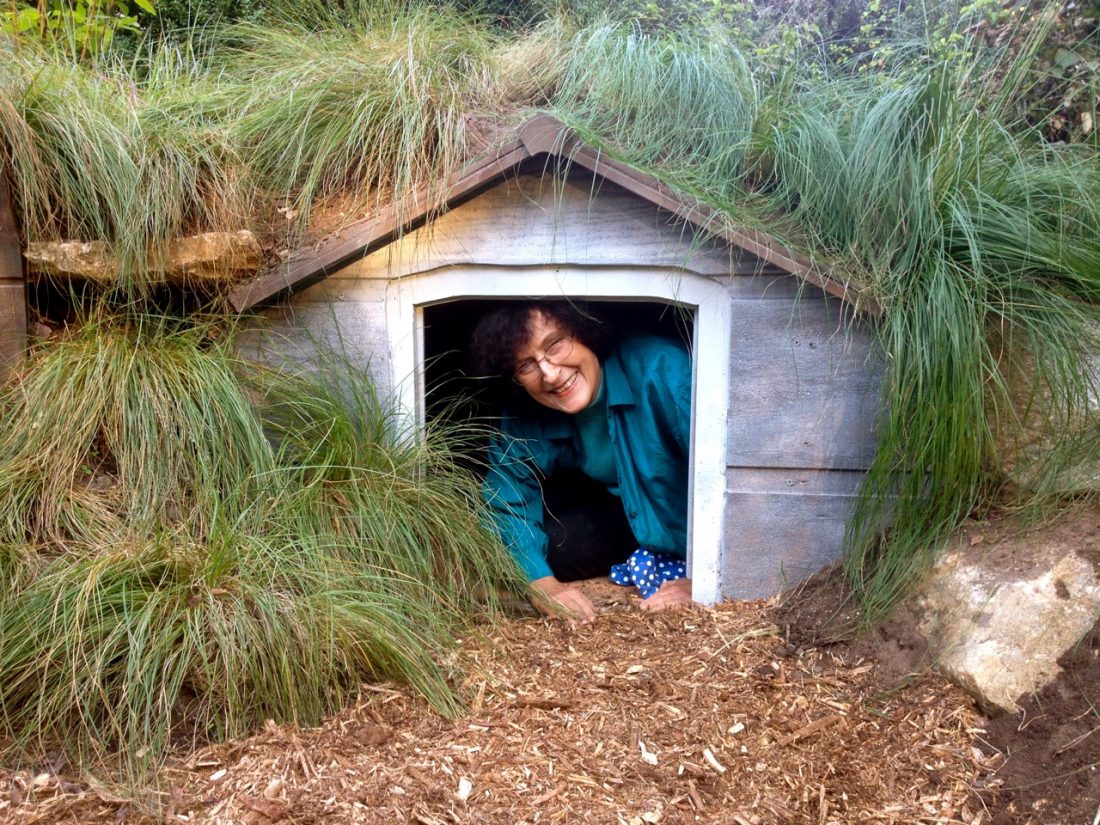
A series of serendipitous events left me as the final designer of the newest addition to the Fernwood Gardens. Although there were many ideas, the one that stuck was the hobbit-inspired garden playhouses. Each playhouse cost around $250.00 in materials and took a total build time of about 8 hours.
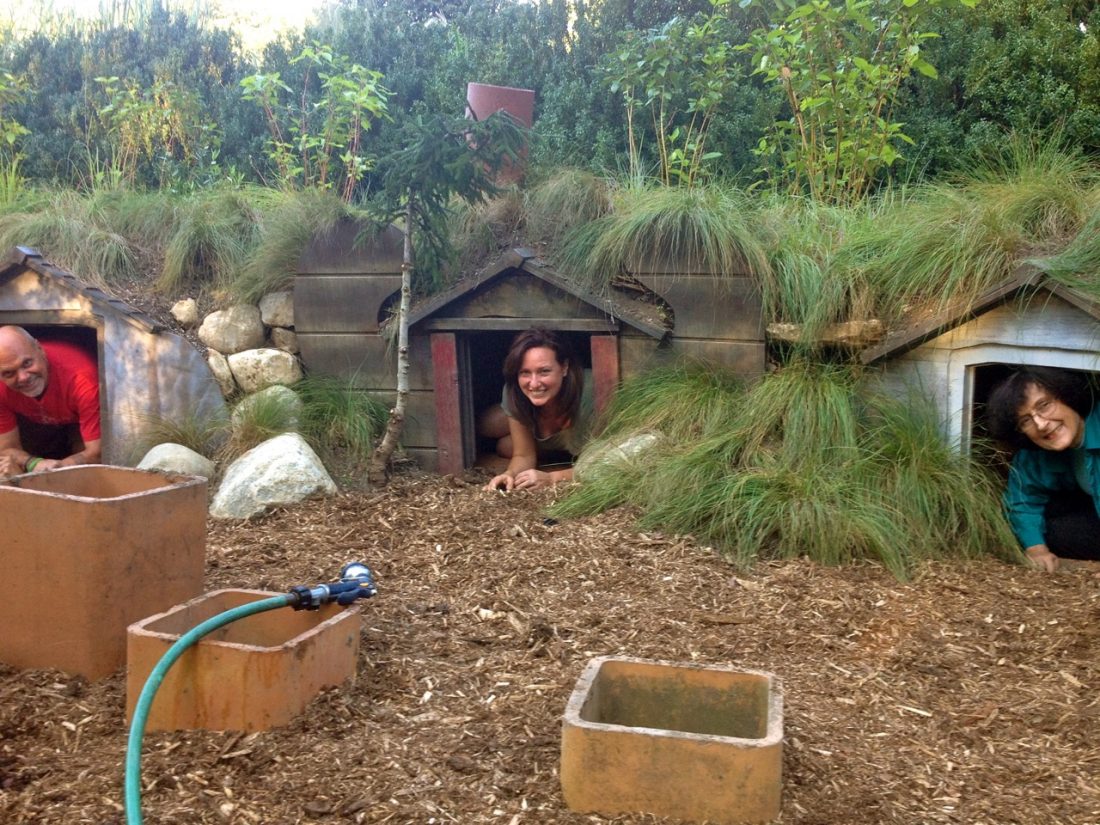
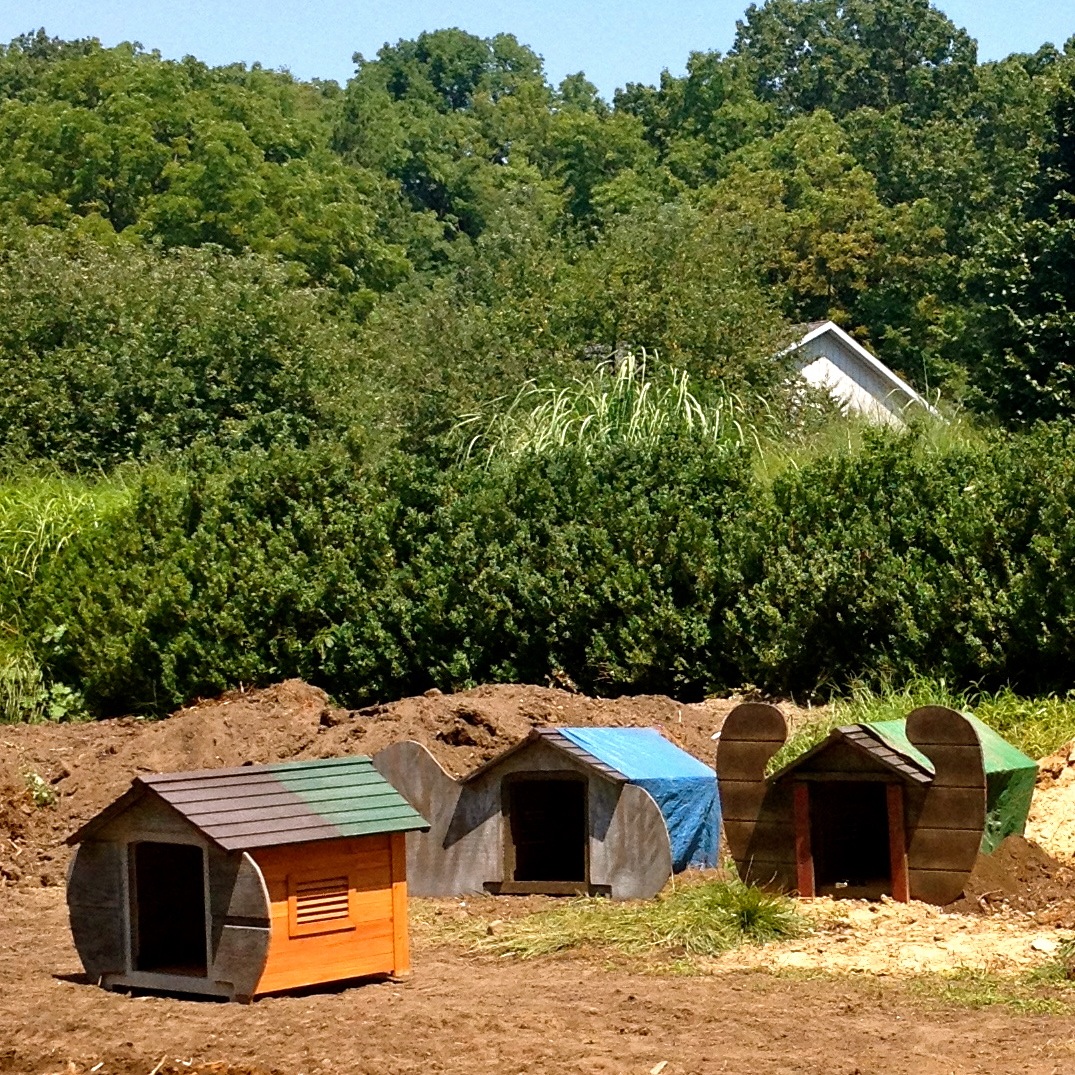
I wanted to keep each garden playhouse as simple as possible to create so I re-purposed easily found parts. The base is an extra large doghouse. This is a prefab, cedar house that only requires a drill to assemble.

Materials:
- Large doghouse (we used The Stable Wood Pet House by Merry Pet, I recommend a size Large)
- Sheet of plywood (1)
- Box of decking screws (1)
- Spray can of foam sealant (1 can)
- Heavy-duty tarp or sheet of plastic (1 at least 8’x10′)
- Staple Gun
- Spray paint of choice
- Light fixture of choice
- Hand saw
Assemble The Garden Playhouse
Put the four walls together and cut a groove out of the back peak to run an extension cord for a light fixture. Once the cord is in place, put the roof on. It takes about twenty minutes to assmble a beautiful new doghouse for a child!
Yes, a doghouse for a child (or an adult). 😉

Create the Garden Playhouse Facade
Measure out the exact size of the front of the house, door, and roofline onto the plywood.
This is where having the mindset of being a five-year-old comes in handy. Play with different free forms or geometric patterns until you decide how you want your hobbit house to look. What you draw on the plywood is the face of your house – so get creative!
Use a jigsaw to cut out your pattern.
Attach your hobbit facade to the front of the doghouse using the decking screws on the corners, doorframe, and roofline of the house.
Fill in gaps with spray foam sealant.
It is time to paint! I wanted to stick with a natural weathered look, so it took around 5 colors of spray paint in different applications to achieve the color of each house. The color and technique is up to you.
Install the garden playhouse
Place the hobbit house in its final location in your hobbit garden and make sure it is on level ground.
At this point, take the tarp or heavy plastic and wrap the back three walls and bottom.
Use the staple gun to secure it to the house.
You are going to build up the soil around the house to create a mound. If you are short on fill dirt, you might consider using styrofoam or rocks stacked against the house to fill the space.
Create a faux mound on top of the house (it is actually real dirt, just not naturally in a mound shape). Cover until the top of the house is under about six to eight inches of dirt.
Use plants to secure the soil. Once a plant’s root system is established, the soil will hold in place and not fall over the peak.
You can choose any type of plants you want – but grasses tend to be a good choice because of their extensive root systems. I used Sporobolus heterolepis for the grassy look.
The last step is to personalize your house.
Secure the lights to the top of the ceiling and decorate away.
And to anyone who thinks the doghouses are small — They fit full-size adults.
For questions or a more detailed explanation, you can contact me here.
-Hayden
Oh I LOVE this! I’d love to make one for my chickens, as they’re bantams & mixed breeds, perhaps this would make them look a little larger?!!? Looks amazing- great way for dog owners as well to settle kennels into their garden.