Let’s get something straight. I’m never going to tell you that you have too many plants.
If, at the height of the growing season, you can see mulch, I’d say you can probably fit more.
And if my blessing isn’t enough to justify running off to the nursery to buy a few more things, consider this:
- Gardens are about plants. Not mulch. (duh)
- Plants are beautiful. Mulch isn’t. (Obviously, but I know some of you will argue this) 😉. A flower bed should have more flowers than anything.
- The more plants you have – the greater the odds you are contributing to a healthy level of biodiversity where you live. Whereas mulch is just mulch. Biodiversity is a very good thing.
- But most of all, ALL plants sequester carbon . So the more you have, the more you’re making a positive impact on climate change.
So fill up those beds! I officially grant you justified permission to keep adding more. More. MORE! (I’m feeling like I should add a maniacal giggle here).
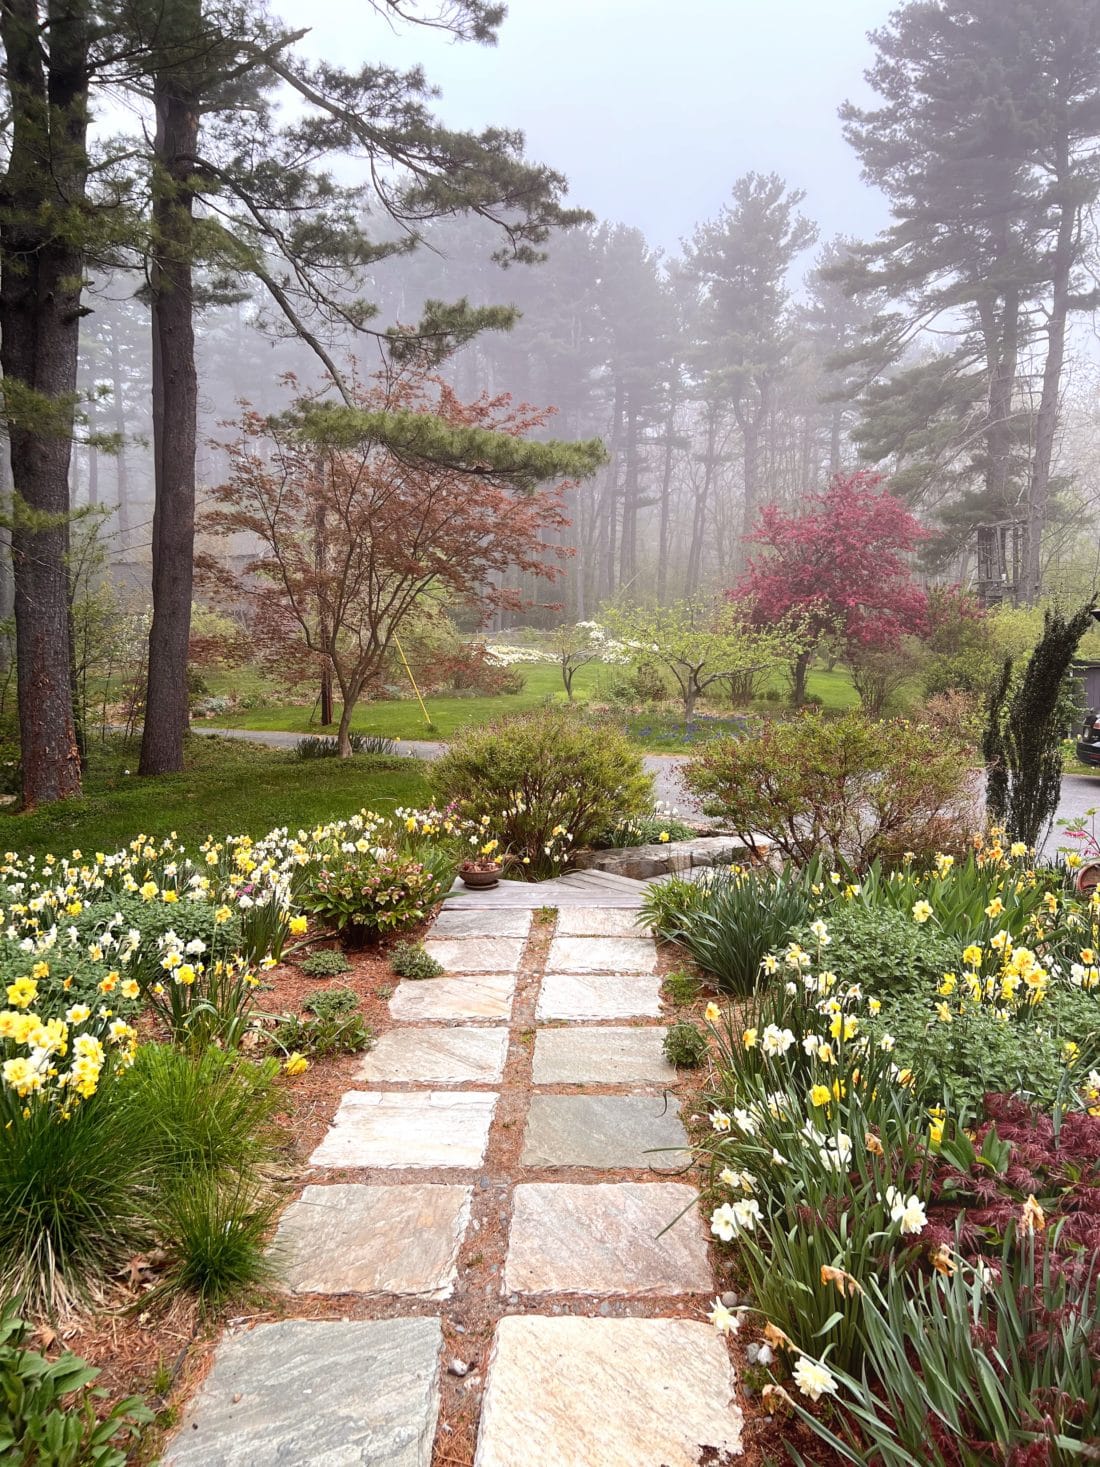
But how, you ask?
Here are my tips for adding new plants and evolving a planting design without completely losing the plot of an original flower bed design (if you had one) or making it look an ever bigger mess. Also, if your existing design is chaotic, these tips will help it to gain some calming cohesion.
Consider what you already have – so you can create planting designs and shopping rules for yourself.
What is the style of your current planting? What colors are you currently using? Are there some seasons that work and seasons that don’t? Or maybe some seasons are just boring?
Take note of whatever framework you already have (the style, colors, etc.). Work within the rules that are already established for the design of your flower bed. Rules and limitations are HELPFUL. There are entirely too many choices in the plant world. Give yourself a reason to exclude options – it will make choosing easier.
EXAMPLE:
I’m going to share my own evolution project with you as I go through these steps – I hope it helps to illustrate.
I designed my front garden flower bed to have a naturalistic look. I love grasses, and I want it to look like a Piet Oudolf-style planting. I’ve been very conscious of the colors here. It’s primarily yellows and purples throughout all the seasons. Splashes of pink come and go, and white is an anchor throughout. There are no reds, oranges, or blues. I also like plants that are wilder, and I am looking for a less formal look.
Last fall, I added lots of daffodils to jazz up the spring, and assessing the results this spring, I’d say it’s pretty great – with one exception. I missed a whole corner. (Where was my brain that day??)
Oh wait – I know exactly what happened – the corner I missed is full of huge grasses in the fall – but look at it in the spring. Big difference.
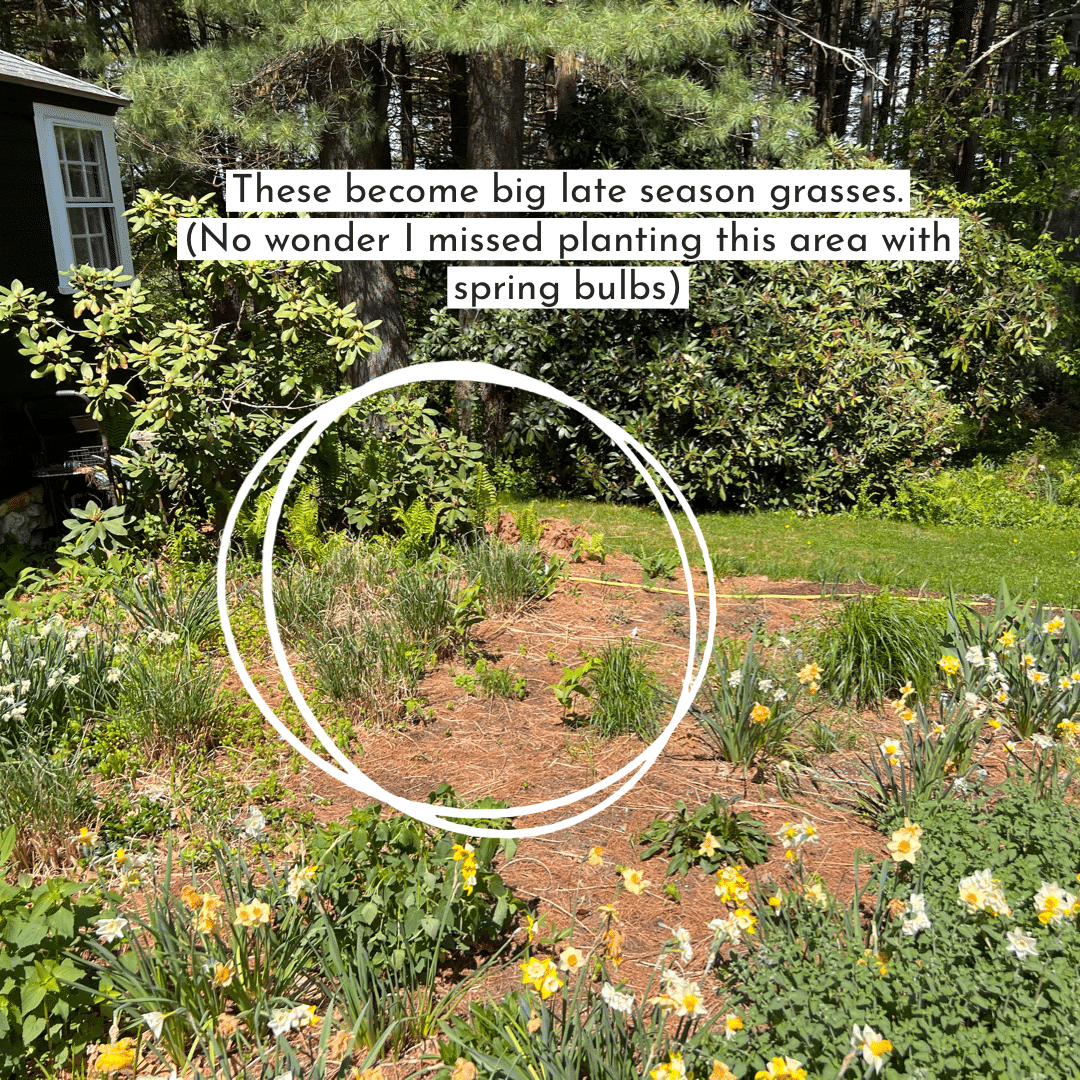
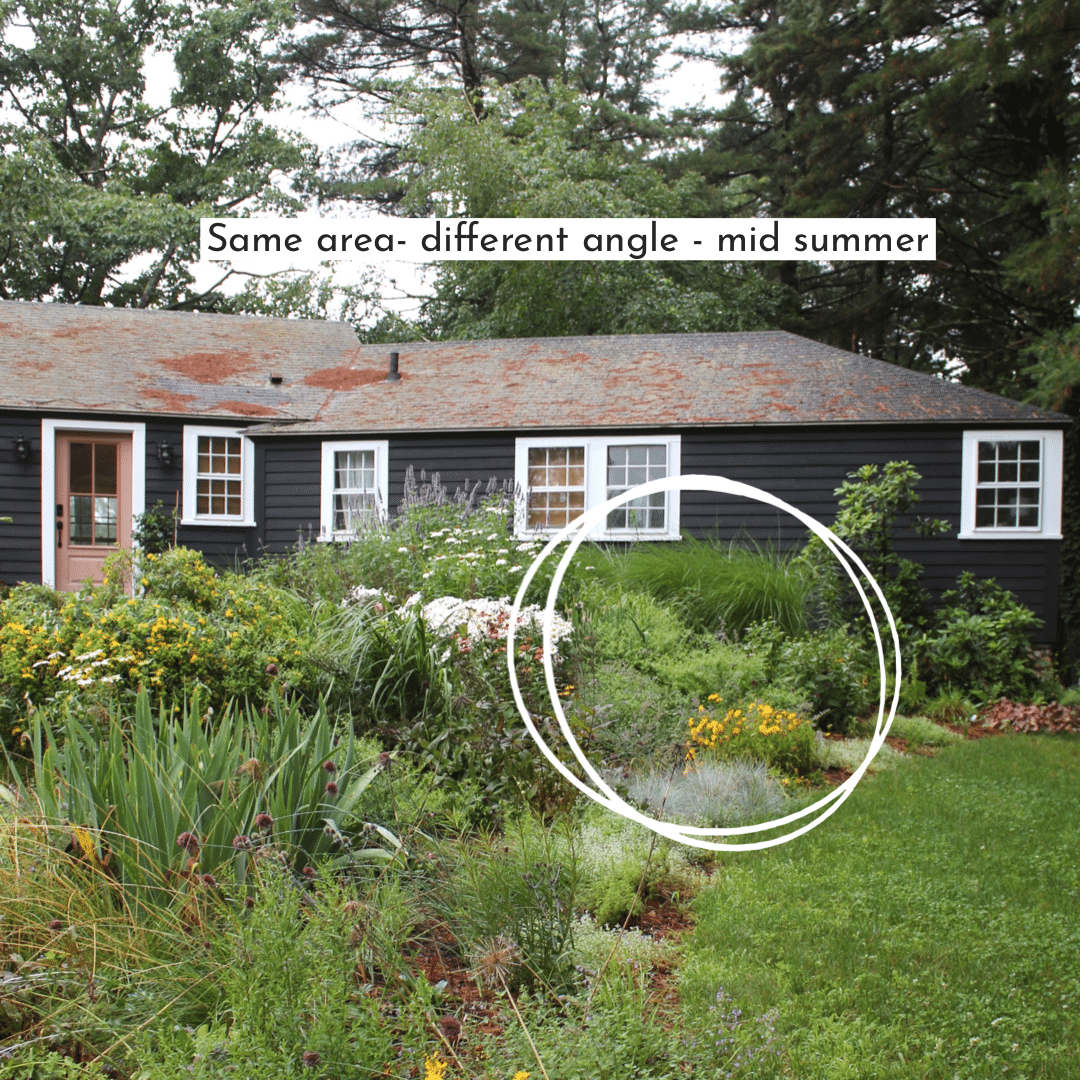
As I am thinking of layering in new plants, I am first shopping for about 75-100 mixed daffodils (consistent with what I already have) to fill in the corner that I missed. Even though that summer picture looks full – the spring pic tells a totally different story – there is plenty of space!
(note how between the grasses – that will be over 4′ tall this summer – there is PLENTY of room for bulbs! And BONUS, the grasses will hide the fading bulb foliage later in the summer.)
PLANTING TIP – Put a reminder in your calendar! In my case, I’ve added ‘order daffodils’ (with details on quantities and location) as an appointment on my calendar in September when it is time order and plant spring bulbs.
I’m also thinking about what other kinds of plants I can add to fill out the color progression through the entire growing season. To help me choose new plants, I’ve got my rules (no red, blue, or orange, and need to match naturalistic/ wilder style, etc.). I’ve shared some of my choices for the whole garden (not just this bed) below.
Use Experimentation to increase your planting success
A few years ago, I tried out (experimented with) about a half dozen different alstroemeria (Peruvian Lilies). I’m on the edge of their hardiness rating, so I was unsure if they’d even survive.
I loved a couple, but I hated some of them too (there was a red and white candy stripe that made even my mind’s eye hurt🤮), and a few didn’t make it. But that yellow one… not only has it persisted (for a few years now), it is gorgeous and healthy, and I look forward to it blooming.
In short, experimentation led me to discover a brilliant new (to me) plant that is rarely seen in flower beds and gardens in my area. It’s time to lean into that.
Create Eye Paths with your Flower bed design.
When you have one of something you love, think about how you experience it.
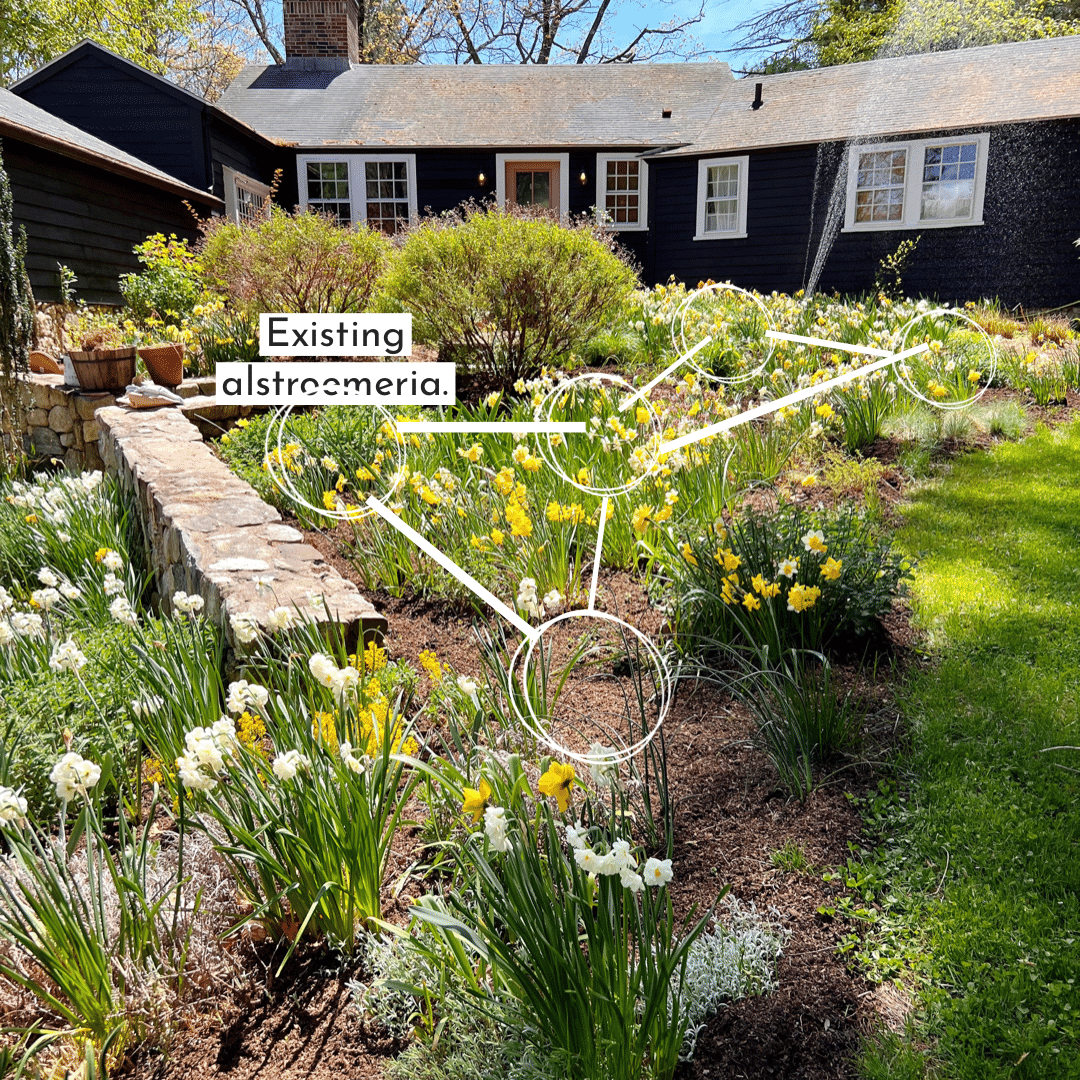
For example, my eye goes right to that Yellow Alstroemeria. Every time I look at the flower bed it’s planted in, it’s the first thing I notice. If I had two or more of them, I know that my eye would go to that first one, and then I’d immediately look for the others, the second one, and then the third one.
For most people, a visual three-pete is gratifying. You can do more, of course, but three will suffice. Think about the path of your eye doing a three-step dance:
1🎶…2, 3🎶…1🎶…2, 3🎶
(boom, boom, boom – I hear it as a waltz in my head – it’s always satisfying).
It’s helpful to think of the eye path as if it were an actual path (though invisible) through your garden. Notice what you will see along the way. The existing alstroemeria is at the bottom left of my flower bed – I want to design an eye path to make its way up the bed towards my house – enjoying myself as it goes. So, I’m adding more along the path I want to (visually take). Zig Zag paths are great for eye paths, and to create them, I work in triangles like this:
GARDEN DESIGN TIP: Remember there are many more paths in your garden that just the actual literal ones that you build. The eye paths are just as important and by giving your eyes visual waypoints, you can create clear routes that not only are exciting and beautiful, but that will make your whole garden feel more cohesive and comforting.
Remember – chaos is not comforting. A little bit of organization goes a long way – even in the wild gardens styles. Repetition gives an underlying framework that helps everything work together.
Flower Bed Design – How do I know if there is room for more plants?
Take pictures and make notes for later. The pictures will inform and remind you what a patch looks like in another season. Because planting often takes place in a totally different season than when we experience the most exciting part of the plant, it is easy to forget the problem we are trying to fix. The pictures will help you remember that the tall grasses are temporary and that come spring, you’ll hardly notice them… and will have lots of space for more daffodils!
Also, some types of plants are much easier to add than others. Bulbs are top on my list for spicing up a bed.
Why? Because they are easily tucked between other plants, and they can even grow through other plants. There is a great selection to bloom not just in the spring but in the summer and fall, too (see here for some great fall bulb planting ideas).
If you’re wondering what I am adding to my garden for more summer blooms from bulbs and tubers… this is the selection:
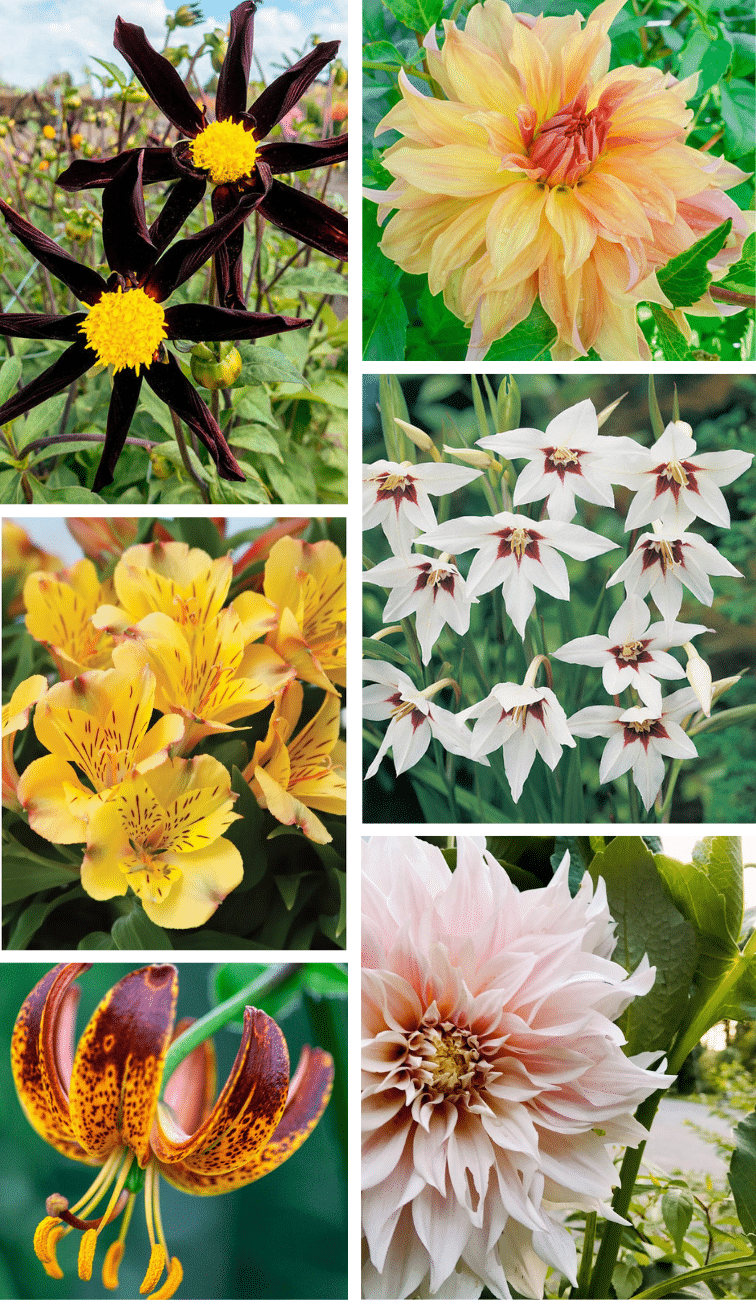
Top left clockwise: Verrone’s Obsidian Dahlia. Big Brother Dahlia. Peacocks Lillies (Peacock orchids). Dahlia Cafe au Lait. Arabian Knight Lily. Majestic Henri Alstroemeria.
Other posts you might find interesting:
+comments+