
I recently met up with a couple of my former instructors from when I attended the English Gardening School in London. Robin Templar Williams and Moira Farnham were running a design seminar at Tower Hill Botanic Garden, and given they were so close to my new home (here in New England) I attended – primarily to catch up with old friends.
It was fun to hear Robin again as he gave a piece of a lecture that I remember clearly from my own school days… This time about Garden shapes
Garden shapes can include geometric patterns like squares and circles, as well as more freeform designs such as curves and spirals to create better plans and layouts for your designs. Note – I hardly ever use triangles… they just don’t work well.
Learn to Ignore the Existing lines and Create New (better) ones
Robin’s lecture had to do with positive and negative shapes in landscape planning. The key point is to plan the space, to some extent, without consideration of the edges. Having also taught many students over the years – I can tell you, this is often the hardest thing for new designers to do.
The natural inclination is to look at the plan view of your garden or to see the shape of your plot out of your back door, bounded by a fence or property line – and just work with that. The lines that pre-exist (typically the property lines – but also sometimes existing features like walls or patios) are so strong and so hard to ignore, that we just naturally feel we must work with them.
We don’t have to work with them.
And you shouldn’t.
Your garden’s design will be much better if you learn to mostly ignore the existing lines and shapes and make new better ones. So many people get stuck with this – they really can’t see how a space can change if you could just ignore what is starting right at you.
(I have a couple of exercises I run with my design students to help them do this – it takes practice and awareness but once you get past it – your creativity and options expand).
It is so easy to look at a planned view of your garden and start trying to plan for its shape. But the shape of a typical plot of land is never very interesting. In fact, it is probably not even completely square. Tying yourself to these lines will inhibit you from imagining all the possibilities.
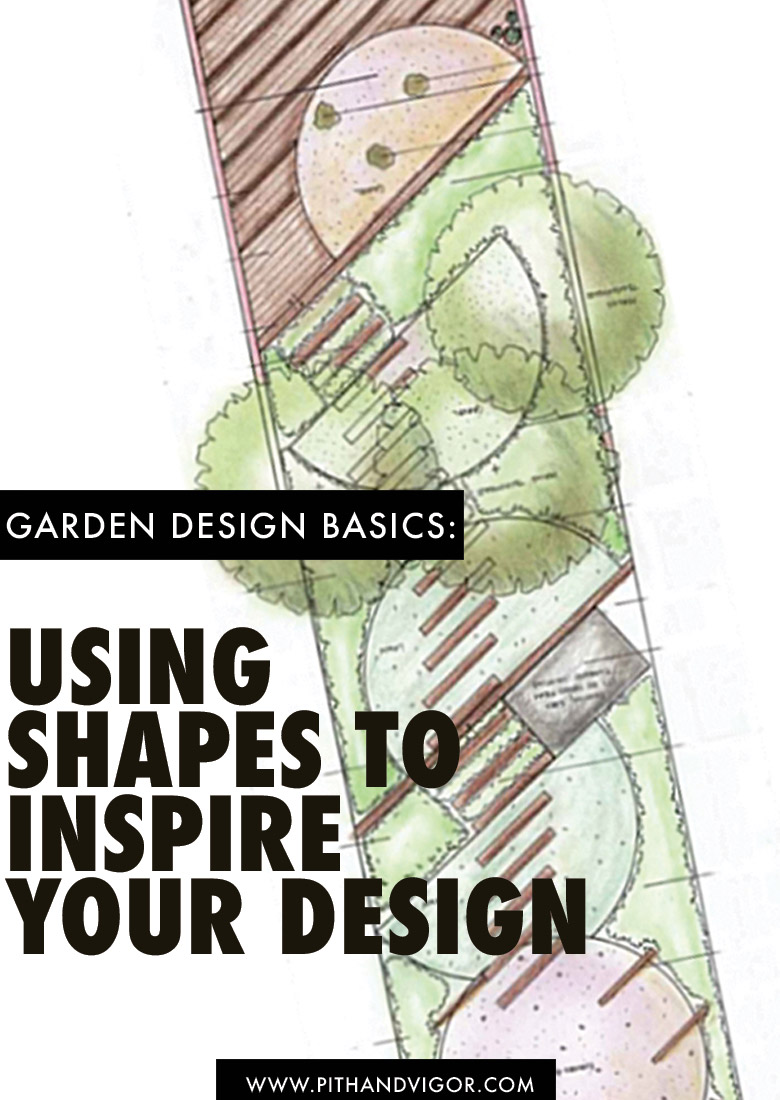
Using Shapes To Inspire Your Design
Try this instead – Ignore the property lines and use varied shapes laid together into something that appeals to you to create a pattern. (see how I have done this on a simple rectangular garden below).
You can draw the shapes or even cut out some shapes from paper and play with them in collage-like fashion until you get something that you like. Work with circles, half circles, ovals, and squares. Ditch the triangles… they will only get you in trouble.
Challenge yourself to make interesting layouts with just these few shapes and see what you can come up with.
Once you have something appealing, duplicate it and try to reimagine how you might move through the shapes and what kinds of garden features they might be. One pattern could turn into many different layouts.
Shapes might manifest into planting areas, open spaces, paths, patios, and positive and negative areas. Once placed in the garden, these become your key elements. Remember to work in the main space of your garden – then you can fill in the edges (usually with plants).
An Example Garden with Shapes:
Imagine your garden is a Rectangle like I’ve drawn below. I used simple shapes (in this case half circles, squares and rectangles) to come up with a sketch in Diagram #1.


This may not be the most functional layout, but you can see how the exact same pattern can become three very different gardens.

Remember – Any awkward spaces can always be hidden in the depths of planting beds. If this garden were not a perfect rectangle, you could still use these shapes and this pattern, but the edges could be filled with plants to create beds. Remember, plants and the beds they grow in can be deep or narrow and as awkward as needed to give you living spaces that are comfortable and sized as you need. They are literal property line shapeshifters.
You will see as you play around with shapes that fences and property lines will disappear.
Work from the Center Out – Not the Edges In
You might also think about this as working from the center out – rather than from the edges in. Most people look at a big blank yard and start by putting beds around the edges. BORING!!!
Instead, start defining spaces in the middle (with some nice shapes that feel good). Consider what you need garden rooms to achieve and size them accordingly, Connect them with hallways (paths) and let them undulate (create definition with level changes).
The end result will be a space reorganized around features you want and need, and it will take on a new style and character. Your garden can avoid the lame ‘foundation planting’ look, and you can inject creativity and interest like a professional designer.
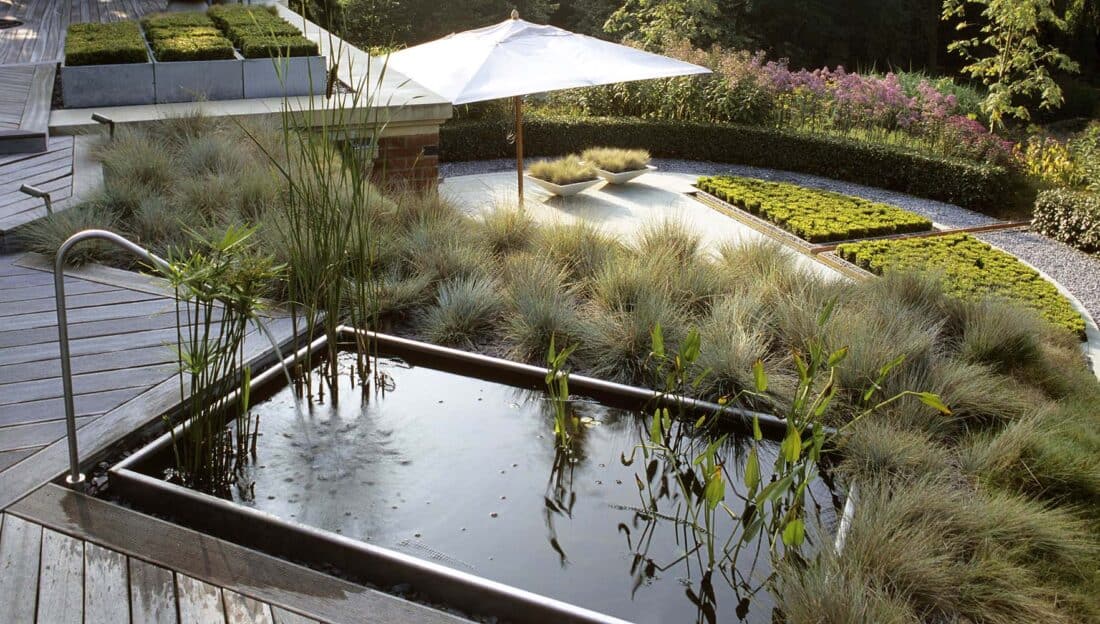
This beautiful modern water garden, by Anthony Paul, illustrates the point of using positive and negative shapes. Don’t you think?
More Garden Design Posts:
Share This Post:
+comments+